People give/drop off furniture and other unwanted gently used items to the Shelter all the time.
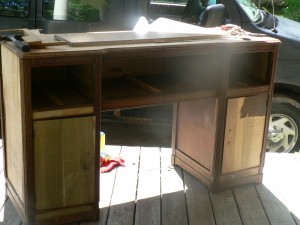
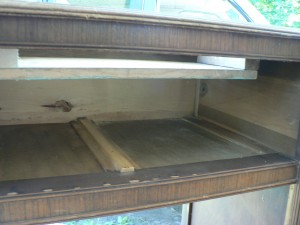
There was a sad looking dresser sitting in the rain, all by it’s lonesome, forgotten and unwanted. Cue in the woman who is always looking for ways to organize and make things harder for her husband work more smoothly. The veneer, while real veneer, was old and ugly. From being in the rain long enough, it had started to peel, buckle, and become unglued. Adam thought I was crazy when I told him I wanted it for my sewing cabinet/storage.
And I am.
I convinced him that I needed it, so we brought it home. It stayed the night in our dinning room to dry out, then it was moved out to the porch the next morning. All the while, Adam it telling my I’m crazy for wanting this thing, seeing that it was so big, tall, and ugly.
It is 4′ 9" long and 3′ high. I saw it’s potential and I knew, I knew!, that it would be a prefect fit for a sturdy sewing table.
To show the world what I saw, I first took off all the buckling veneer to expose the sturdy, solid wood underneath. I knew I was going to paint it, so I didn’t care about the kind of wood it was.
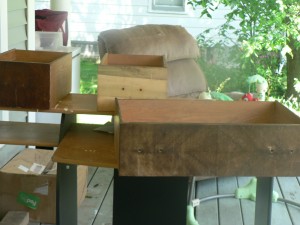
Next, we took off the hardware and cleaned out the drawers.
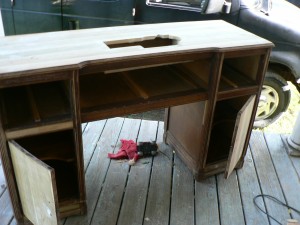
In the sewing cabinet I had before, Adam had fashioned some plywood to the shape of my machine, so it would sit flush with the top. He took this template and traced the same shape on top of the cabinet.
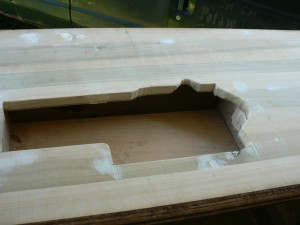
After a bit of use from the circular saw and the saws-all (not the best tools to use, but the jigsaw is broken), the hole was complete.
Thankfully, the front drawer is quite deep, measuring in at 7 1/2", so there was room for him to make a brace for my machine to rest on, yet leaving enough room to still use the drawer.
We did some measuring and some eye-balling and he used some scraps from around the house to make the brace for my machine to rest on.
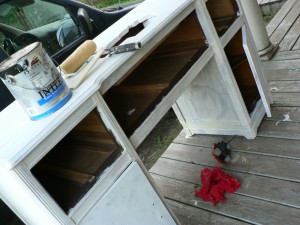
After he was done configuring things, it was my turn with the sander and paint brush. The stain of the wood is dark and there was no way I was even going to attempt to sand in all those grooves, so I primed it after sanding the non-grooved surfaces.
Once that was dry, I painted it in Antique White. This is the same color as the walls in the dinning room (where my sewing corner is) and it was already in the house. Which means
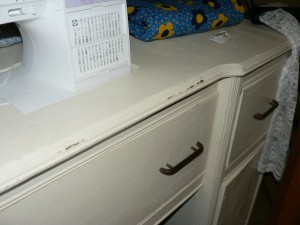
Once the paint was dry (the next morning), I lightly sanded the corners to give it a distressed look. I only did one coat because I wanted the dark stain to show through a little bit.
I had originally thrown the hardware into the fire pit, for it was ugly and I didn’t want it. But then Adam suggested just taking off the plastic part, leaving the metal pull. I am so glad he did, for I love it! Being metal, and old, it has some slight rust on it, which goes quite well with the distressed look I want.
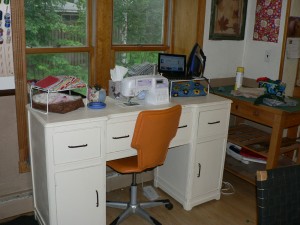
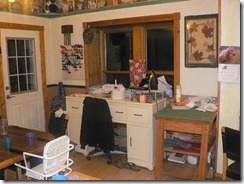
It fits beautifully in front of our bay windows, allowing the glorious natural light to come in! To the left of the cabinet is the front door and this is one of the first things people see (that’s what spurned me in the first place to organize this space!).
My cutting table sits to the right of it and I can roll that in and out when I need to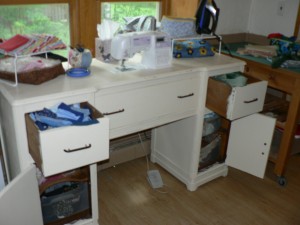 (this is another free-bee that we found. Someone was throwing it out and was on the curb. I’ve been wanting some place to keep my cutting mat and this was an excellent solution!). I have put all my scraps into the drawers/cabinets since plastic drawers fit nicely into the cabinets, allowing my to have 6 drawers instead of 2. They are nicely within reach now. (sorry for the blurry picture)
My thread lives to the left of the window, behind the front door. Adam made this rack so I can see at a glance what colors I have and which ones need to be restocked. Plus, it keeps them out of harms way and untangled. Of course, they are sorted in rainbow order. Is there any other way?!

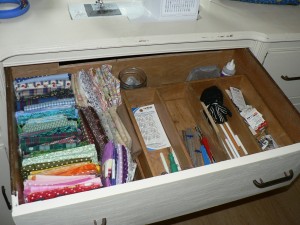
While the nice, deep drawer in the front houses my fat quarters (I need more!!) and small misc. necessities that easily get lost.

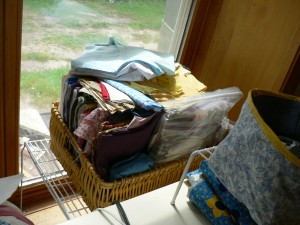 Now, my WIP’s (Works In Process) live in a basket right behind my sewing machine, so they are in my view each time I sit down or stand up. Perhaps they’ll get done sooner with them here. Perhaps….
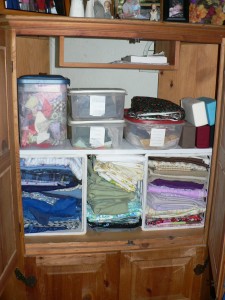 I reorganized the entertainment center turned fabric center and I now have all my fabric together. Both the pre-cuts and the yardage are in the upper portion of the cabinet. The lower part has misc. stuff (buttons, denim fabric for a future picnic quilt, my embroidery thread, etc.) and there is still room for more.There is a shelf in the dressing room (the downstairs bedroom turned children’s closet) that has even more misc. stuff (like batting, the mending basket, patterns, etc.) and it’s nice to get all the up and out of the way, but still within reach if/when I want them.
I used to want a sewing room, like I used to have in this house when we first moved in. But not anymore. My sewing space is in the dinning room, in the heart of my home, where I can hear what’s going on, see what’s happening, and keep things in check before they blow up! True, I don’t have the storage space a single room would allow, but that only gets me to be creative with what I have.
I am quite in love with my new sewing cabinet! My older one was so low that it hurt my back when I sat there at the machine for any length of time. Don’t get me wrong, I am very grateful that Adam reconfigured it for me. But I am a tall woman (5’8") and having something taller then table height is comfortable for me. Plus, there is enough room of the top of it to put projects, lay them out, store them there, etc. without getting in my way.
All in all, total amount spent of this awesome sewing cabinet: $9.00 (12 washers and 2 packages of sand paper from the hardware store).
Total time spent: 6 hours
Total time enjoying this: forever (or at least, several years)!!
I christened it with the making of some curtains in my kitchen. I made those from a full size sheet. I have a tutorial planned on how to make these easy curtains, so stayed tuned!!


Found your page on Moda Bake Shop’s Stash Linky Party! I really love what you did with that dresser! Great way to give it new life 😀
You did a great job on that poor dresser. And as a former home schooling Mom I can see how convenient it would be to have the sewing table in the hub of the home. Thanks for visiting my blog and leaving a comment 🙂